Costco Gluten-Free Pizza Cooking Instructions: A Comprehensive Guide
Navigating the world of gluten-free pizza can be tricky, but Costco offers convenient options! This guide provides detailed instructions,
covering preheating, baking times, and troubleshooting, ensuring a delicious experience with Sabatasso’s gluten-free pizzas.
Enjoy a perfectly cooked pizza every time!
Understanding the Costco Gluten-Free Pizza Options

Costco currently features Sabatasso gluten-free pizzas as a readily available choice for members seeking a convenient, allergy-friendly meal. These pizzas are typically sold in packs of two, offering excellent value and ensuring you have a backup for another meal or to share.
While Costco’s gluten-free pizza selection may evolve, Sabatasso remains a consistently popular option due to its taste and ease of preparation. It’s important to note that while these pizzas are gluten-free, individuals with severe allergies should always review the ingredient list to confirm suitability for their specific dietary needs. Costco’s website, Costco.com, is the best resource for the most up-to-date information regarding available gluten-free products and any potential changes to their offerings.
Keep an eye out for potential seasonal or limited-edition gluten-free pizza varieties that Costco may introduce, expanding your options beyond the standard Sabatasso selection.
Sabatasso Gluten-Free Pizza: A Popular Choice
Sabatasso gluten-free pizza has gained significant popularity among Costco shoppers due to its taste and convenience. Many reviewers praise its surprisingly good flavor profile, often comparing it favorably to traditional wheat-based pizzas. The quick baking time – typically around 10-15 minutes – is a major draw for busy individuals and families.
This pizza is particularly appealing because it eliminates the need for extensive preparation. Simply remove it from the packaging and place it directly on the oven rack or a pizza stone. Its relatively quick cook time at temperatures between 425°F and 500°F makes it a fast and easy meal option.
The availability in a two-pack provides excellent value, allowing for multiple meals or the option to freeze one for later enjoyment. Sabatasso’s gluten-free pizza consistently receives positive feedback for being a delicious and accessible gluten-free alternative.
Checking for Updated Cooking Instructions on Costco.com
Costco frequently updates product information, including cooking instructions, on its website. Therefore, it’s always a good practice to verify the most current recommendations directly on Costco.com before baking your Sabatasso gluten-free pizza. To access this information, navigate to the Costco website and use the search bar to locate the specific pizza product.
Once you’ve found the product page, scroll down to the “Product Details” or “Preparation & Cooking” section. Here, you should find the latest recommended oven temperature and baking time.
Remember that online shopping requires a Costco membership; new members can create an account, while existing members can access their cards online. Regularly checking Costco.com ensures you’re utilizing the optimal cooking method for the best possible pizza experience, as formulations or recommendations may change over time.

Optimal Cooking Methods
Achieving pizza perfection hinges on your chosen method! Utilizing a pizza stone at 500°F, or direct oven rack baking at 425°F, yields fantastic results.
Preheating Your Oven: Temperature Considerations
Proper oven preheating is crucial for a crispy crust and melted cheese. Generally, a temperature of 425°F (218°C) is recommended for baking Costco’s gluten-free pizzas, ensuring even cooking throughout. However, if you’re employing a pizza stone, an elevated temperature of 500°F (260°C) is advised to maximize the stone’s heat retention capabilities and deliver a superior crust texture.
Allow sufficient preheating time – at least 15-20 minutes – to guarantee the oven reaches the desired temperature. This ensures the pizza cooks efficiently and achieves optimal results. Remember, variations in oven calibration can occur, so monitoring the actual oven temperature with an oven thermometer is a prudent step. Consistent heat distribution is key, so avoid overcrowding the oven with other items during baking. Experimenting with slight temperature adjustments within the recommended range can help you tailor the cooking process to your personal preference and oven’s performance.
Recommended Oven Temperature: 425°F (218°C)
For consistently good results with Costco’s gluten-free pizzas, 425°F (218°C) is the go-to oven temperature. This setting strikes a balance, allowing the crust to bake through without burning the cheese or toppings. Many users report excellent outcomes using this temperature, achieving a golden-brown crust and fully melted, bubbly cheese in approximately 10-15 minutes.
This temperature is particularly effective when baking the pizza directly on the oven rack. It provides sufficient heat for even cooking without requiring a pizza stone. While 500°F is an option with a stone, 425°F offers a more forgiving and reliable experience for those without one. Remember to preheat your oven thoroughly before placing the pizza inside for optimal baking. Adjusting baking time slightly based on your oven’s specific characteristics is always recommended to achieve your desired level of crispness.
Alternative Oven Temperature: 500°F (260°C) ⎯ For Pizza Stone Use
If you’re utilizing a pizza stone, elevating the oven temperature to 500°F (260°C) can significantly enhance the crust’s texture. The stone’s ability to retain and distribute heat evenly creates a crispier, more restaurant-quality base. However, this higher temperature requires careful monitoring to prevent burning, especially with the gluten-free crust.
Preheating the pizza stone along with the oven to 500°F is crucial – allow ample time for both to reach the desired temperature. This method often reduces baking time to around 12 minutes or less. Be vigilant in checking the pizza frequently after the 8-minute mark. While 500°F delivers superior crust crispness, it’s best suited for experienced bakers comfortable adjusting baking times to avoid overcooking. Remember, results may vary based on your oven and stone type.
Using a Pizza Stone for Enhanced Crust
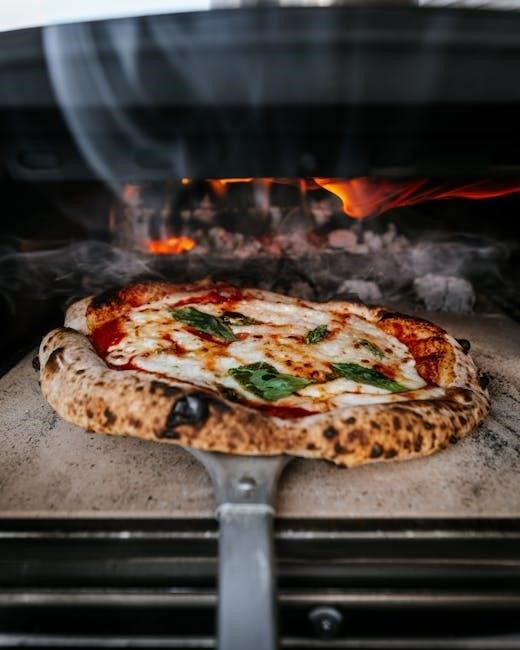
Employing a pizza stone is a fantastic method to achieve a superior crust texture with your Costco gluten-free pizza. Pizza stones retain heat exceptionally well, mimicking the effect of a professional pizza oven and delivering a crispier, more evenly cooked base compared to baking directly on a rack.
The stone’s porous nature draws moisture away from the dough, contributing to that desirable crunch. When using a stone, preheating is paramount – allow at least 30-60 minutes at the recommended temperature (425°F or 500°F, depending on your preference). Placing the stone on the lower-middle rack is generally advised for optimal heat distribution. Carefully slide the pizza onto the preheated stone; a pizza peel can be incredibly helpful for this step. Enjoy a restaurant-quality crust at home!

Positioning the Pizza Stone in the Oven
Strategic placement of your pizza stone is crucial for optimal baking results with your Costco gluten-free pizza. Generally, positioning the stone on the lower-middle rack of your oven is recommended. This placement allows for even heat distribution, ensuring the crust cooks thoroughly without burning the toppings.
Avoid placing the stone on the very bottom rack, as this may result in an undercooked crust. Similarly, avoid the top rack, as it could lead to over-browning of the cheese before the crust is fully cooked; Some sources suggest placing the stone on the rack next to the bottom rack. Always ensure there’s sufficient space around the stone for proper air circulation. Preheating the stone for at least 30-60 minutes is vital before placing the pizza on it!
Directly on the Oven Rack: A Simpler Approach
For those without a pizza stone, baking your Costco gluten-free pizza directly on the oven rack is a perfectly viable and convenient option. Simply remove all packaging from the pizza and place it directly onto the middle rack of your preheated oven. This method still delivers a satisfyingly crispy crust, though it may not achieve the same level of crispness as using a stone.
Ensure the rack is clean and free of any debris before placing the pizza. Using a baking sheet underneath isn’t generally recommended, as it can trap moisture and result in a softer crust. Monitor the pizza closely during baking, as cooking times may vary slightly depending on your oven. This approach is ideal for a quick and easy pizza night!
Step-by-Step Cooking Instructions
Let’s begin! First, remove the pizza from its packaging. Then, place it in your preheated oven. Bake until the cheese is melted and bubbly, and the crust is golden brown.
Preparation: Removing Packaging
Before you begin baking your Costco gluten-free pizza, proper preparation is key! Carefully remove the frozen pizza from its cardboard box. Next, you’ll need to unwrap all of the plastic packaging that encases the pizza. This includes the outer plastic wrap and any inner layers securing the toppings. Ensure no plastic remnants remain on the pizza itself, as these are not edible and could affect the flavor or even pose a safety hazard.
Take a moment to inspect the pizza for any damage that may have occurred during transport. While rare, it’s good practice to check. Once fully unwrapped, you’re ready to proceed to the baking stage. Remember, a clean and properly prepared pizza will yield the best results, so don’t rush this initial step!
Discard the packaging responsibly.
Baking Time: Initial Guidelines
Determining the correct baking time is crucial for a perfectly cooked Costco gluten-free pizza. As a starting point, aim for a baking duration of approximately 10 to 15 minutes. However, this is merely a guideline, and several factors can influence the optimal baking time. These include your oven’s specific calibration, the desired level of crispness for the crust, and even personal preference regarding cheese melt.
Many users report successful results within 12 minutes at 425°F, while others prefer a slightly longer bake for a more golden-brown crust. It’s always best to begin with the shorter end of the range and incrementally add time as needed. Consistent monitoring during baking is essential to prevent overcooking or undercooking.
Remember to check frequently!
Typical Baking Duration: 10-15 Minutes
The sweet spot for baking your Costco gluten-free pizza generally falls within the 10 to 15-minute timeframe. This duration assumes a preheated oven set to either 425°F or, if utilizing a pizza stone, 500°F. However, consider this a flexible starting point, not a rigid rule. Initial tests suggest 12 minutes at 425°F often yields excellent results, particularly with the Sabatasso variety.
Factors like oven variations and individual preferences necessitate careful observation. A slightly longer bake – closer to 15 minutes – can deliver a crisper crust, while a shorter time preserves a softer texture. Don’t hesitate to experiment within this range to discover your ideal baking time. Remember to always prioritize visual cues, such as melted cheese and a golden-brown crust, over strictly adhering to the clock.
Adjusting Baking Time Based on Oven and Preference
Ovens aren’t created equal! Calibrations vary, meaning a 425°F setting on one oven might differ slightly from another. If your pizza isn’t cooking as expected, adjust the baking time accordingly. A convection oven may require a shorter bake time – perhaps reducing it by a minute or two – due to its more efficient heat circulation.
Personal preference also plays a crucial role. Do you prefer a softer, chewier crust or a delightfully crispy one? For a crispier base, extend the baking time by a couple of minutes, keeping a close watch to prevent burning. Conversely, if you favor a softer crust, reduce the baking time slightly. Regularly checking the pizza’s progress is key to achieving your desired texture. Remember, these are guidelines; experimentation is encouraged!
Monitoring the Pizza During Baking
Consistent observation is vital for pizza perfection! Begin checking the pizza around the 10-minute mark, even if the initial guidelines suggest a longer baking time. The first thing to assess is the cheese – it should be fully melted and bubbly, with a slight golden-brown hue. If the cheese isn’t quite there, continue baking for another minute or two, checking frequently.
Simultaneously, evaluate the crust’s crispness. Gently lift a corner with a spatula; it should be firm and golden brown underneath. A pale or soft crust indicates the need for additional baking. Remember, gluten-free crusts can sometimes take a bit longer to achieve optimal crispness. Avoid opening the oven door excessively, as this can lower the temperature and affect the baking process.
Checking for Melted Cheese
Assessing cheese melt is a key indicator of doneness! Around the 10-minute mark, carefully observe the cheese covering the Costco gluten-free pizza. You’re looking for a complete melt, where the cheese has lost its original shape and appears smooth and flowing. Bubbling is a positive sign, indicating the cheese is actively melting and beginning to brown.
A slight golden-brown color on the cheese is ideal, adding to both the flavor and visual appeal. If the cheese remains stubbornly unmelted in spots, extend the baking time by a minute or two. Remember to rotate the pizza halfway through baking for even melting. If the cheese is browning too quickly, reduce the oven temperature slightly or cover the edges with foil.
Assessing Crust Crispness
Achieving a delightfully crisp crust is crucial for a satisfying pizza experience! While the cheese melts, simultaneously check the crust’s texture. A properly baked Costco gluten-free pizza crust should be firm to the touch and exhibit a golden-brown color. Gently lift a corner of the pizza with a spatula to assess the underside – it should be firm and slightly browned, not pale and doughy.
If the crust lacks crispness, continue baking for an additional 2-3 minutes, keeping a close watch to prevent burning. Using a pizza stone significantly enhances crust crispness, as it provides direct heat transfer. Remember that gluten-free crusts often require slightly longer baking times to achieve optimal texture compared to traditional crusts.

Troubleshooting & Tips
Encountering issues? Don’t worry! Common problems like uneven cooking, melting issues, or soft crusts are easily addressed with simple adjustments to time and temperature.
Pizza Not Cooking Evenly?
Uneven cooking is a frequent concern with frozen pizzas, but easily remedied. First, ensure your oven is accurately calibrated; an oven thermometer is invaluable. Rotate the pizza halfway through the baking time – this simple step promotes even heat distribution.
If one side consistently browns faster, consider using a pizza stone positioned in the center of the oven. The stone retains heat and provides a more consistent baking surface. Also, avoid overcrowding the oven with other items, as this can disrupt airflow.
Check if your oven has hot spots; some ovens naturally heat unevenly. Experiment with slightly adjusting the rack position – moving the pizza higher or lower – can sometimes solve the issue. Finally, ensure the pizza isn’t directly touching the oven walls, which can cause localized overheating.
Cheese Not Melting Properly?
Difficulty melting the cheese is a common issue, often easily addressed. First, verify your oven temperature is accurate using an oven thermometer. A slightly low temperature can prevent proper melting. Extending the baking time by a minute or two can also help, but monitor closely to avoid burning the crust.
If using a lower oven temperature (like 425°F), consider briefly switching to the broiler for the last minute or two, watching carefully to prevent burning. However, this requires constant attention! Ensure the pizza is positioned relatively close to the broiler element.
Sometimes, the cheese isn’t evenly distributed. Gently spreading the cheese before baking can help. Also, ensure the pizza isn’t frozen solid before baking; allowing a slight thaw can aid in even melting.
Crust Too Soft?
A soft crust can be disappointing, but several adjustments can create that desirable crispness. Utilizing a pizza stone is highly recommended, as it draws moisture away from the crust, promoting a firmer texture. Ensure the stone is preheated thoroughly – at least 30 minutes at 500°F is ideal.
If baking directly on the oven rack, consider lowering the rack position one level closer to the heating element during the last few minutes of baking. This increased heat exposure can crisp up the base.
Extending the baking time by 2-3 minutes can also help, but watch carefully to prevent burning. Allowing the pizza to cool slightly on a wire rack after baking can further enhance crispness, preventing steam from softening the crust.
Finding the Nearest Costco Store for Purchase
Locating your nearest Costco for Sabatasso gluten-free pizza is simple! The most convenient method is to utilize the Costco store locator on their official website, Costco.com.mx. Simply navigate to the homepage and find the “Store Locator” feature, typically positioned at the top of the page.
Enter your city, postal code, or address into the search bar, and the locator will display a map with nearby Costco locations. Each listing provides the store’s address, phone number, hours of operation, and available services.
Alternatively, you can use the Costco mobile app, which also features a store locator with similar functionality. Checking store availability online before visiting can save you a trip, ensuring the gluten-free pizza is in stock!